
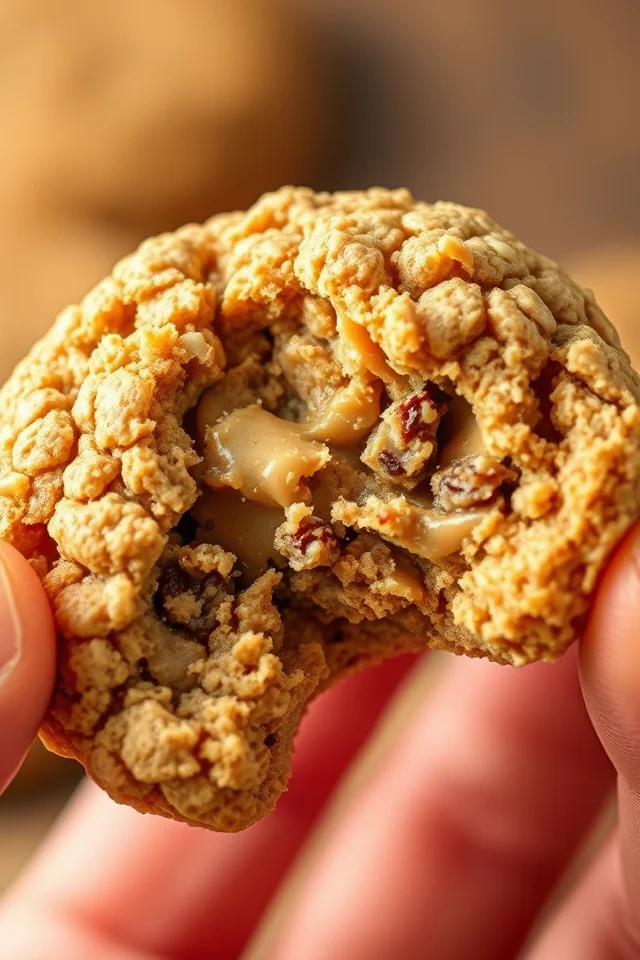
Easy Peanut Butter Oatmeal Cookies
There’s nothing quite like the smell of freshly baked cookies wafting through your kitchen, especially when they’re these incredibly chewy peanut butter oatmeal cookies that have become an absolute favorite in our house!
If you’ve been searching for the perfect peanut butter cookie recipe that’s not overly sweet but packed with that rich, nutty flavor we all crave, you’ve found it.
These cookies strike the perfect balance between chewy and satisfying, with hearty oats adding wonderful texture that makes each bite absolutely irresistible.
What makes this recipe extra special?
It’s been thoroughly tested by my toughest critics – my family! Brian declared these his absolute favorite cookies (which is saying something), and even little Lachlan couldn’t stop “helping” in the kitchen. There’s something magical about baking with loved ones, and these cookies bring that warmth and joy to every batch.
Prep Time: 15 minutes
Cook Time: 12-15 minutes
Total Time: 27-30 minutes
Yield: 24 cookies
Difficulty: Easy
Ingredients
Dry Ingredients:
Wet Ingredients:
Instructions
1. Prepare Your Dry Ingredients – Start by sifting together the all-purpose flour, baking soda, and salt in a medium bowl. This ensures even distribution of the leavening agents and prevents any lumps. Set this mixture aside while you work on the wet ingredients. The sifting step might seem optional, but it really does make a difference in the final texture of your cookies.
2. Cream the Butter and Peanut Butter – In a large mixing bowl, combine the softened butter and peanut butter. Using an electric mixer (hand mixer works perfectly fine), cream these together until the mixture is light and fluffy. This process incorporates air into the mixture, which contributes to the cookies’ tender texture. Don’t rush this step – proper creaming is key to achieving the perfect cookie consistency.
3. Add the Sugars – Gradually add both the brown sugar and granulated sugar to your butter mixture. The brown sugar adds moisture and that lovely caramel flavor, while the granulated sugar helps with structure. Continue mixing until everything is well combined and the mixture looks creamy and uniform in color.
4. Incorporate the Eggs and Vanilla – Add the eggs one at a time, mixing well after each addition. This prevents the mixture from curdling and ensures proper emulsification. Follow with the vanilla extract, giving everything a final mix. At this point, your kitchen should smell absolutely amazing – that’s when you know you’re on the right track!
5. Combine Wet and Dry Ingredients – Add the flour mixture to your wet ingredients and mix on low speed just until the flour is almost incorporated. Don’t overmix at this stage, as we still have one more ingredient to add. Overmixing can lead to tough cookies, and we want these beauties to stay tender and chewy.
6. Fold in the Oats – Add the oats to your cookie dough and mix on low speed just until they’re evenly distributed throughout the dough. The oats not only add wonderful texture but also give these cookies their signature heartiness. Once the oats are incorporated and no streaks of flour remain, your dough is ready.
7. Shape and Bake – Preheat your oven to 350°F (175°C). Using a cookie scoop or tablespoon, portion the dough into 2-tablespoon sized balls and place them on ungreased baking sheets, leaving about 2 inches between each cookie. Bake for 12 minutes for softer, chewier cookies, or 13-15 minutes if you prefer them with a bit more crispness around the edges.
8. Cool and Enjoy – Allow the cookies to cool on the baking sheet for 5 minutes before transferring them to a wire rack. This brief cooling period lets them set up properly without becoming too firm. Serve warm for the ultimate indulgence, or store in an airtight container for up to one week (though they rarely last that long in our house!).

Nutrition Information
Per cookie (makes 24 cookies)
| Nutrient | Amount | % Daily Value* |
|---|---|---|
| Calories | 285 | 14% |
| Total Fat | 15g | 19% |
| Saturated Fat | 6g | 30% |
| Cholesterol | 35mg | 12% |
| Sodium | 185mg | 8% |
| Total Carbohydrates | 35g | 13% |
| Dietary Fiber | 2g | 7% |
| Total Sugars | 22g | – |
| Protein | 7g | 14% |
| Vitamin E | 2.1mg | 14% |
| Niacin | 3.2mg | 20% |
| Magnesium | 45mg | 11% |
Frequently Asked Questions
Can I use crunchy peanut butter instead of creamy?
Absolutely! Crunchy peanut butter will add even more texture to these cookies. The recipe works perfectly with either variety, so use whatever you prefer or have on hand.
How do I know when the cookies are done?
The cookies should look set around the edges but still appear slightly soft in the center. They’ll continue cooking on the hot pan even after you remove them from the oven, so don’t overbake them if you want that perfect chewy texture.
Can I make the dough ahead of time?
Yes! You can refrigerate the dough for up to 3 days or freeze it for up to 3 months. If baking from chilled dough, you may need to add an extra minute or two to the baking time.
Why don’t these cookies need chilling time?
The combination of ingredients and ratios in this recipe creates a dough that holds its shape well without chilling. The oats also help prevent excessive spreading, so you can go straight from mixing to baking.
Can I substitute the oats?
Quick oats can be substituted for old-fashioned oats, but the texture will be slightly different. Avoid instant oats as they’ll break down too much during baking. For a gluten-free option, use certified gluten-free oats.
How should I store these cookies?
Store cooled cookies in an airtight container at room temperature for up to one week. For longer storage, freeze the baked cookies for up to 3 months.
Conclusion
These peanut butter oatmeal cookies have earned their place as a family favorite for good reason. They’re incredibly easy to make, require no chilling time, and deliver that perfect chewy texture that makes them absolutely irresistible.
The combination of rich peanut butter and hearty oats creates a cookie that’s satisfying without being overly sweet – exactly what you want in a homemade treat.
Whether you’re baking with little helpers like I was, or enjoying some peaceful solo time in the kitchen, this recipe is foolproof and forgiving. The joy of sharing these warm cookies with family and friends is what home baking is all about.
So preheat that oven, gather your ingredients, and get ready to fill your home with the most amazing aroma and your heart with the satisfaction of creating something truly delicious from scratch.
Happy baking, and don’t forget to save a few cookies for yourself – they disappear faster than you might expect!


